Documentation Index
Fetch the complete documentation index at: https://docs.cadcamfun.xyz/llms.txt
Use this file to discover all available pages before exploring further.
Quick Start Guide
This quick start guide will help you get started with the CAD/CAM application right away, showing you the basic features and essential steps to create your first project.Accessing the Application
Interface Overview
Once logged in, you’ll see the main dashboard with the following elements: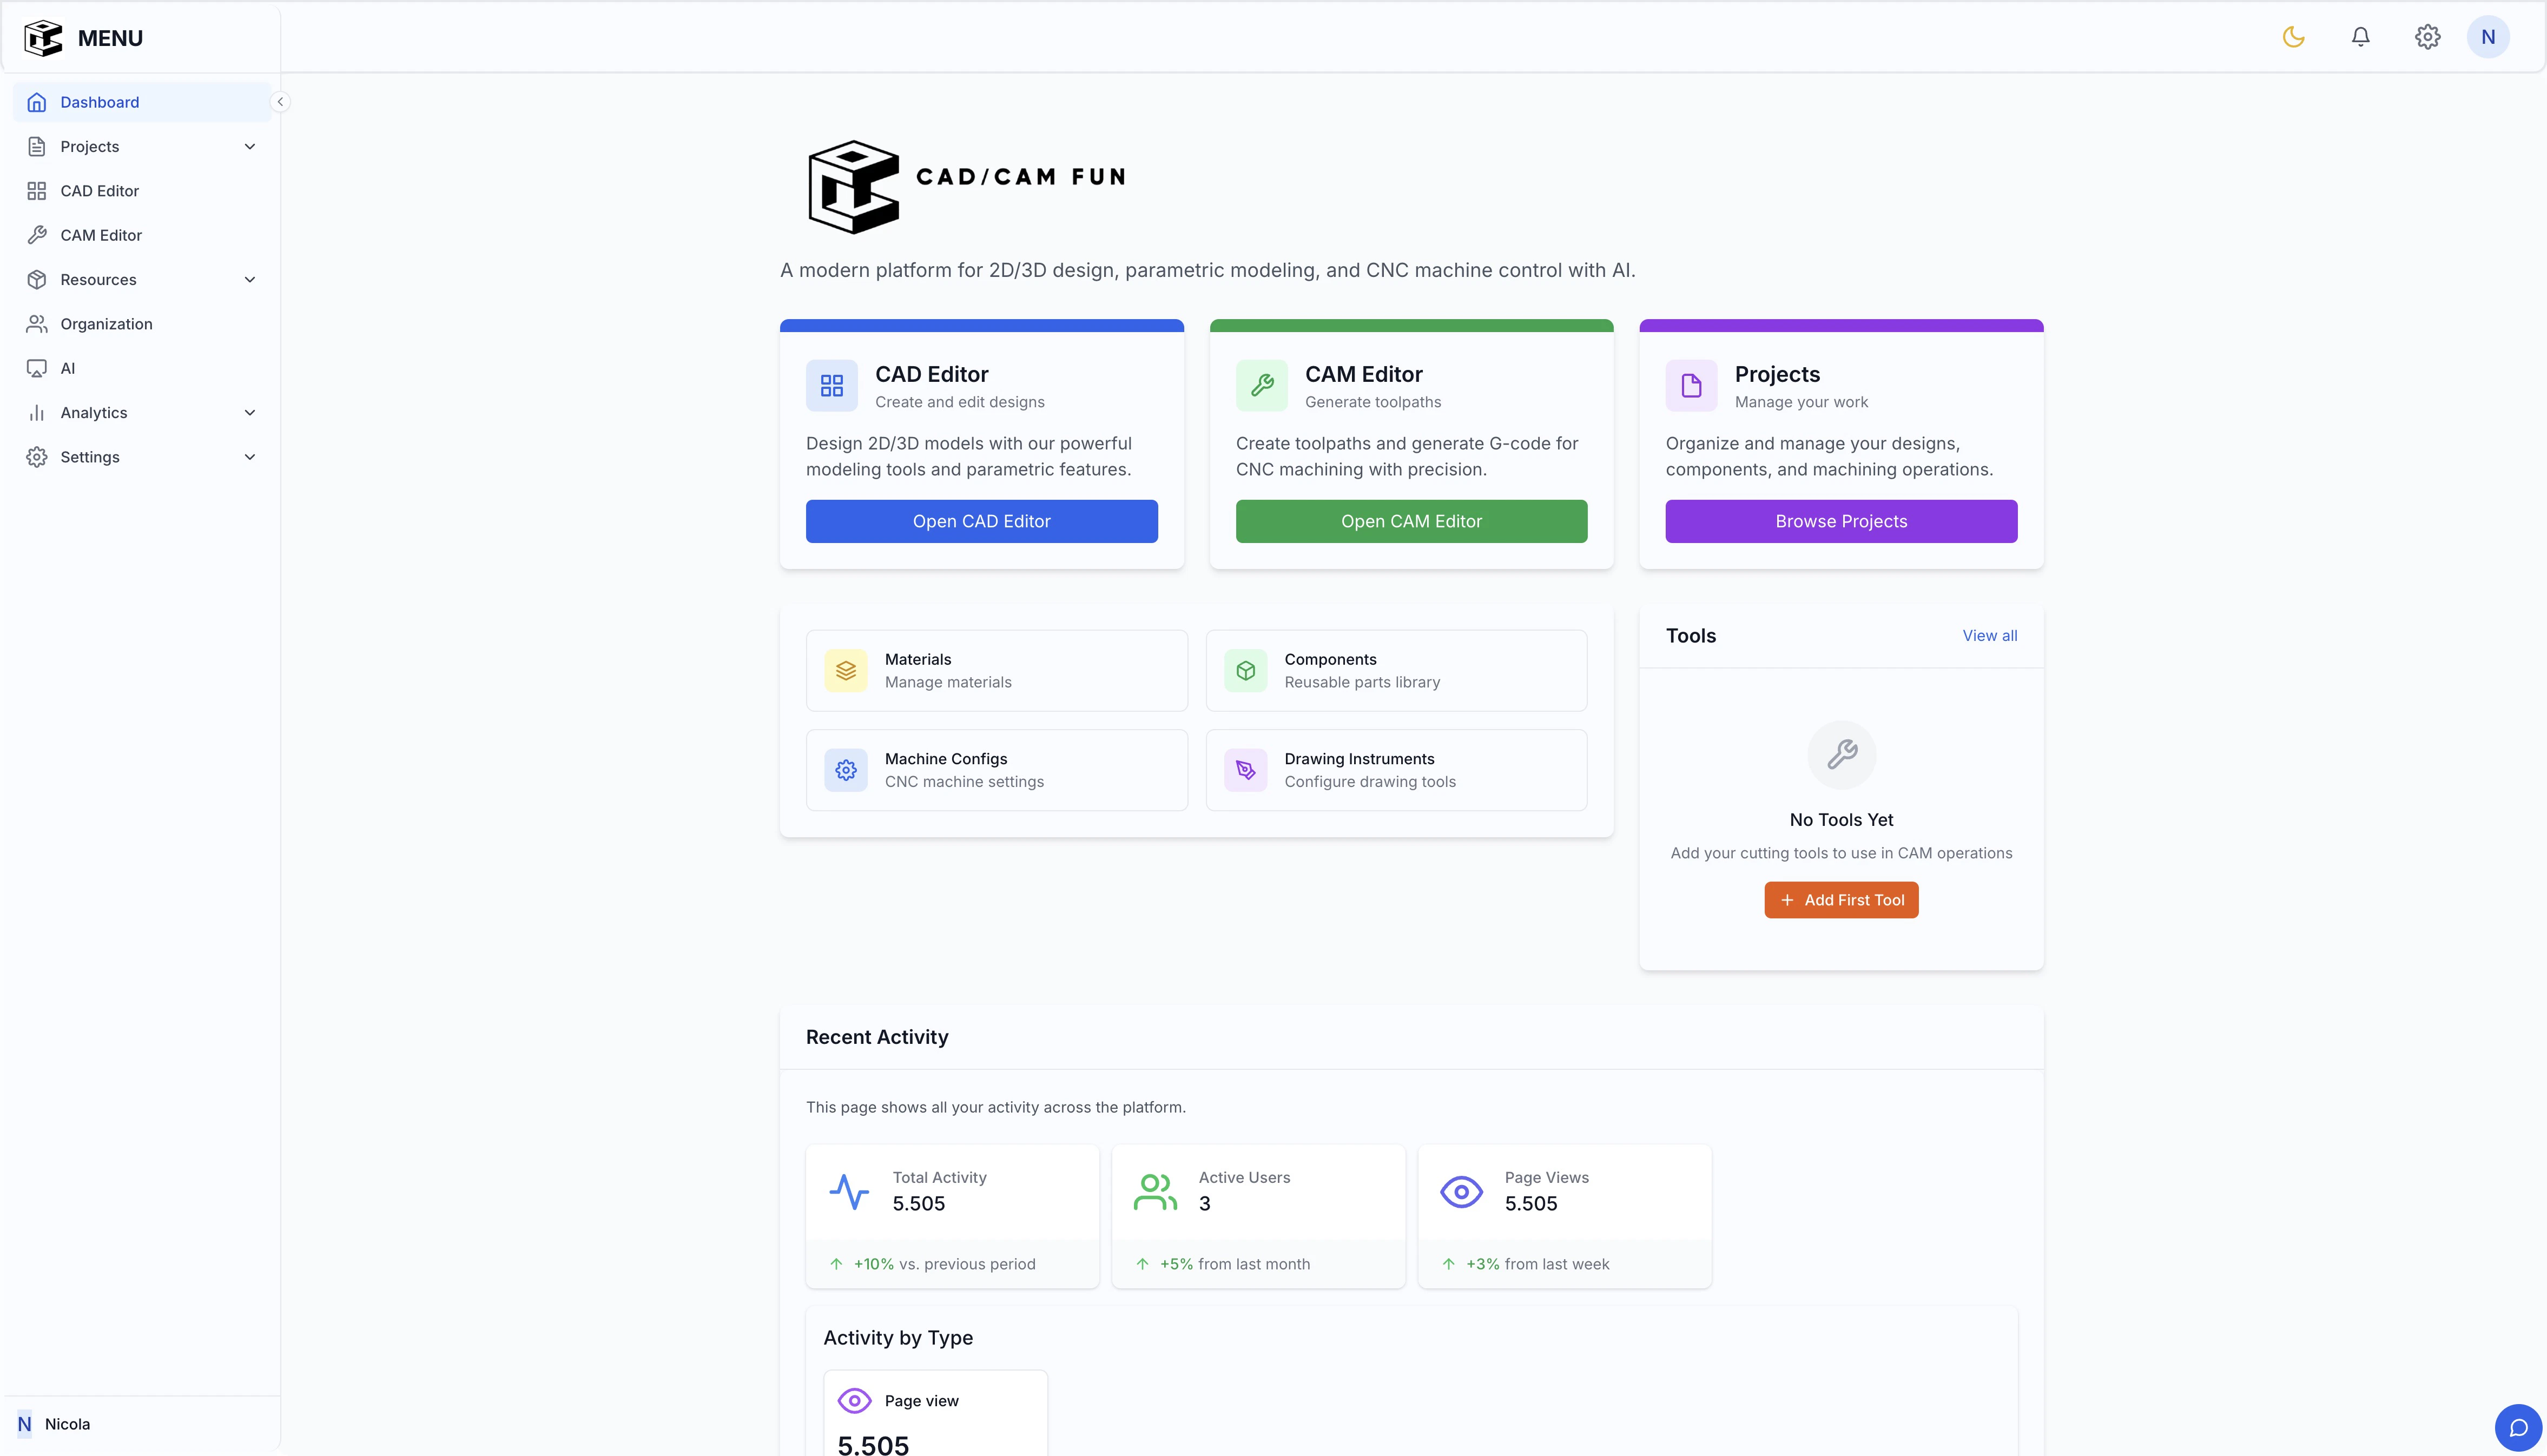
Main Dashboard
CAD Editor
CAD Editor
Complete design environment for creating and modifying 2D and 3D models. Accessible from the “CAD Editor” button in the main dashboard.
CAM Editor
CAM Editor
Environment for generating and optimizing toolpaths for CNC machines. Accessible from the “CAM Editor” button in the dashboard.
Projects
Projects
Management of your existing projects, with options to organize, search, and filter. Shows information such as creation date, last update, and team members.
Materials
Materials
Complete library of materials available for toolpath simulation and optimization. Includes physical properties and machining parameters.
Components
Components
Collection of reusable parts that can be quickly inserted into your projects. Includes both standard and custom components.
Machine Configurations
Machine Configurations
Settings for different types of CNC machines, including parameters, limitations, and specific post-processors.
Drawing Tools
Drawing Tools
Drawing tools configuration, including styles, default parameters, and preferences.
Creating Your First Project
To create a new project:
You will be redirected to the project page, where you can start adding drawings and components.
Using the CAD Editor
To start designing:Familiarize with interface
The design environment will open with the following areas:
- Top toolbar: Contains file, edit, view, and other tools
- Left sidebar: Contains drawing tools, layers, and settings
- Central workspace: The space where you create and modify your drawings
- Properties panel on right: Shows properties of selected element
- Bottom status bar: Shows coordinates, measurement units, and other information
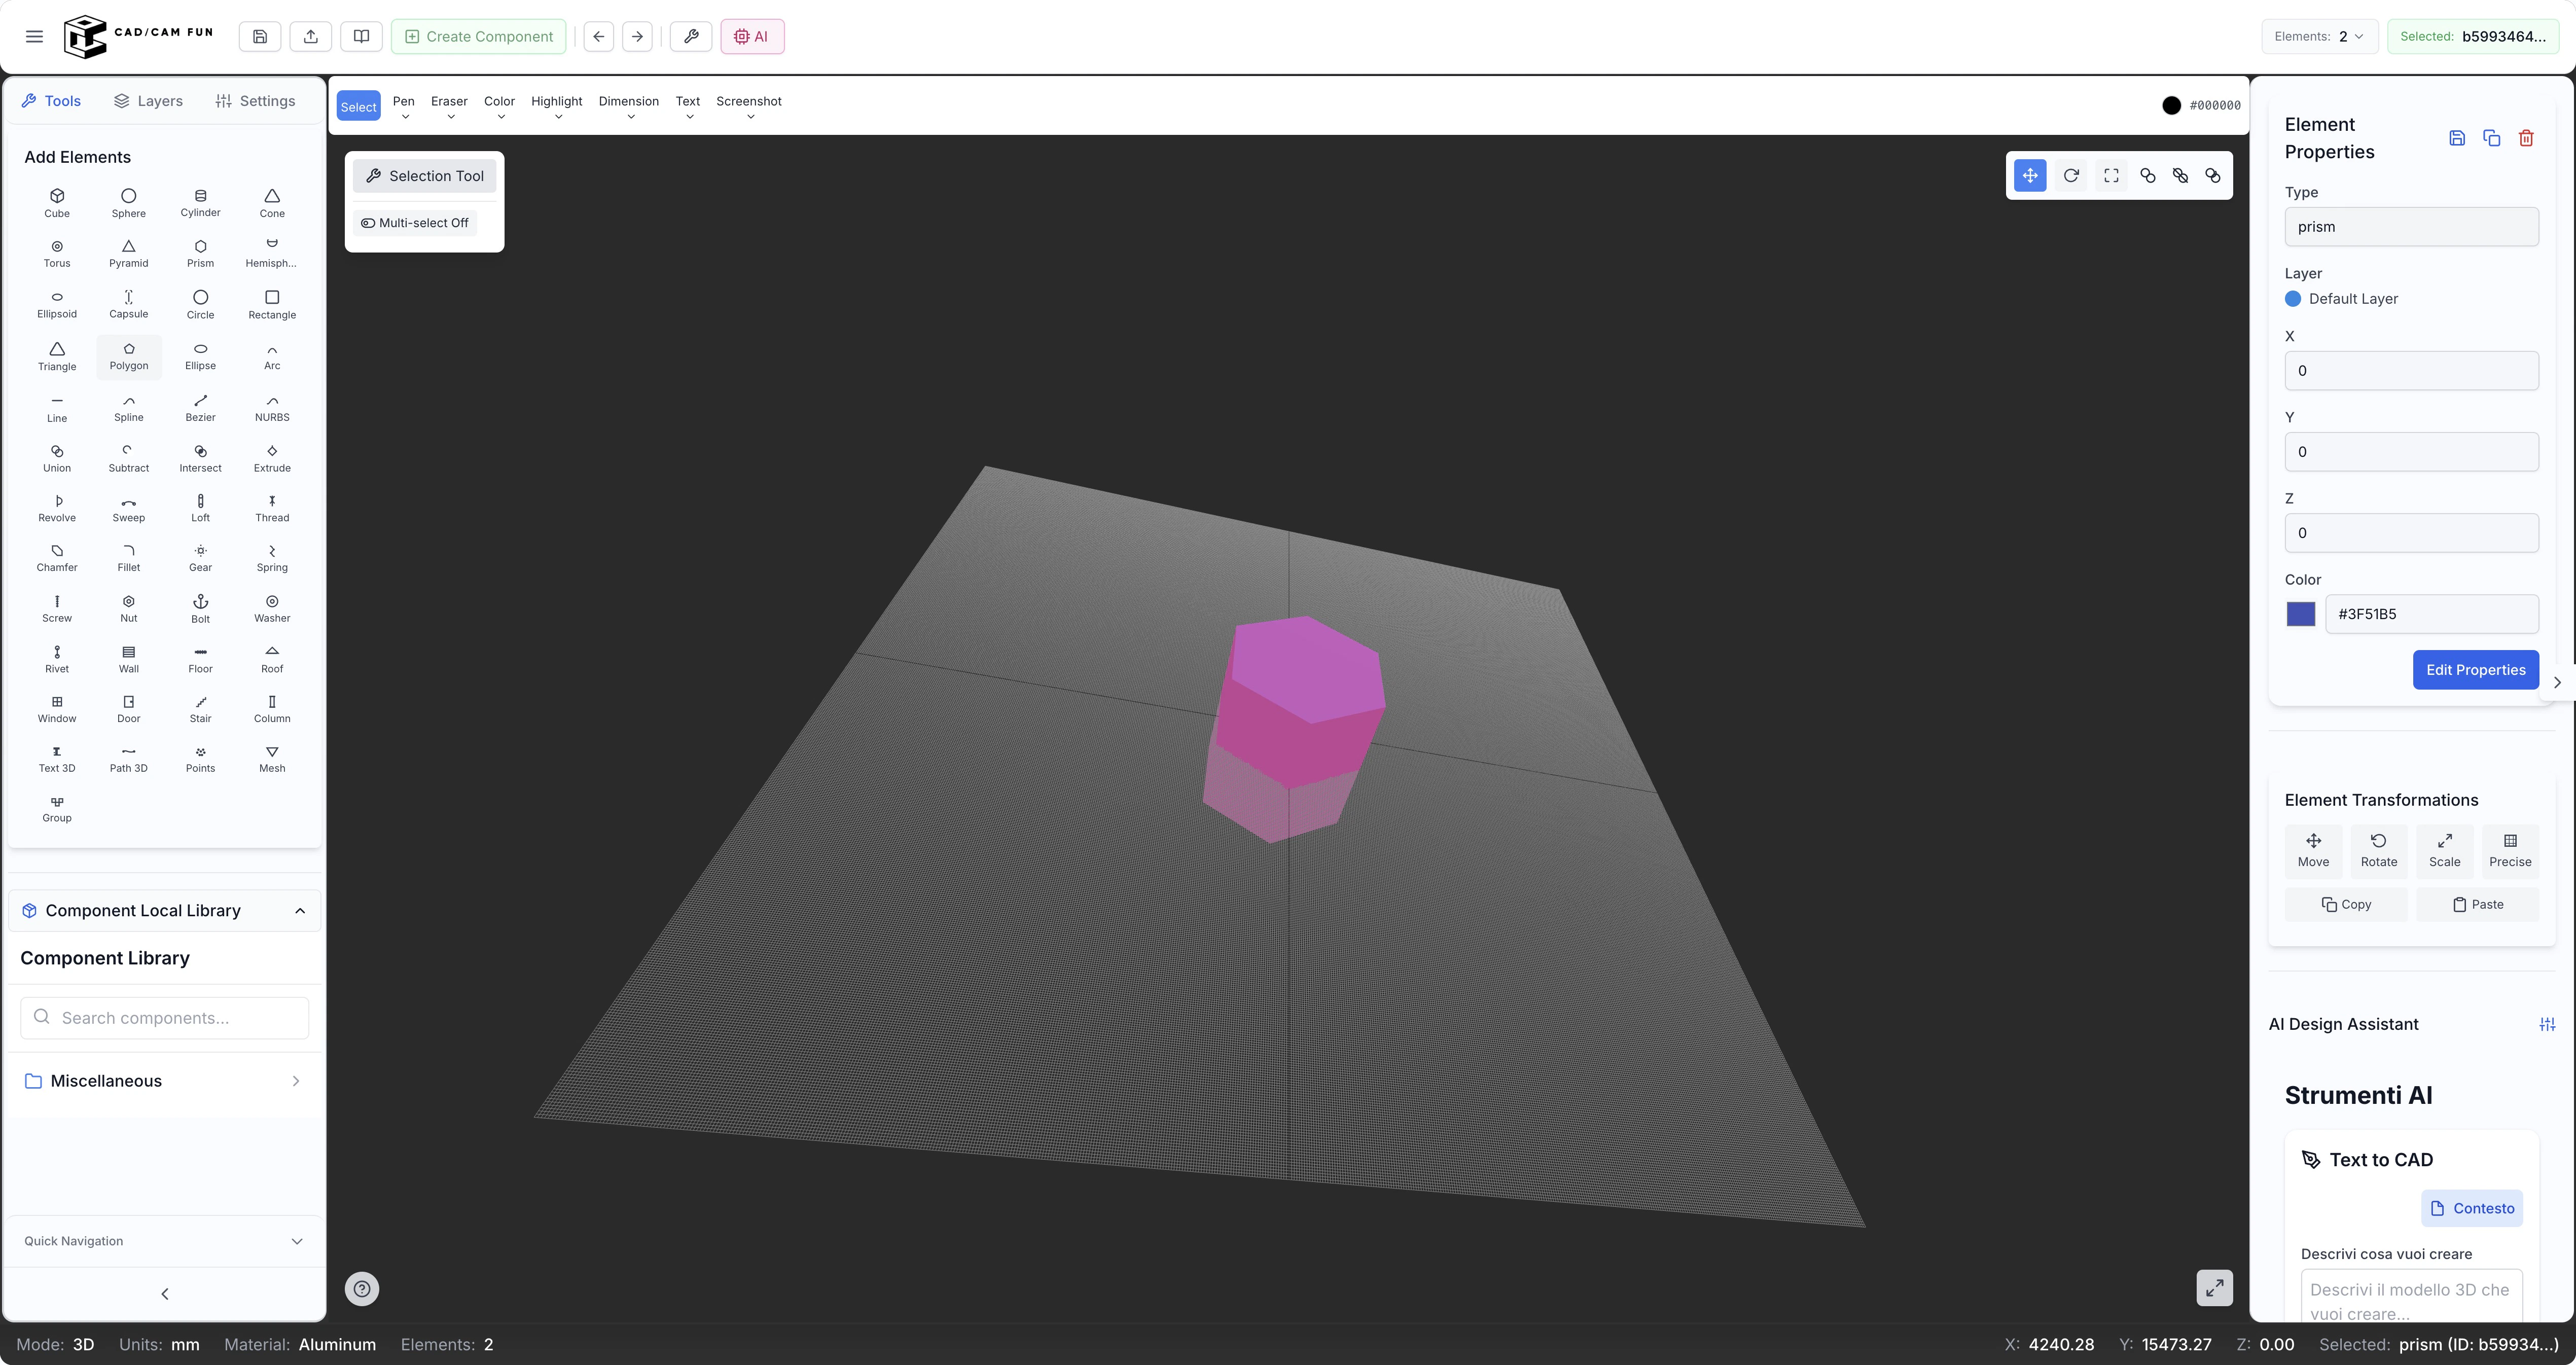
Creating a Basic Drawing
Modify properties
Use the properties panel on the right to modify dimensions, color, or other properties
Saving Your Work
Using the CAM Editor
To generate toolpaths: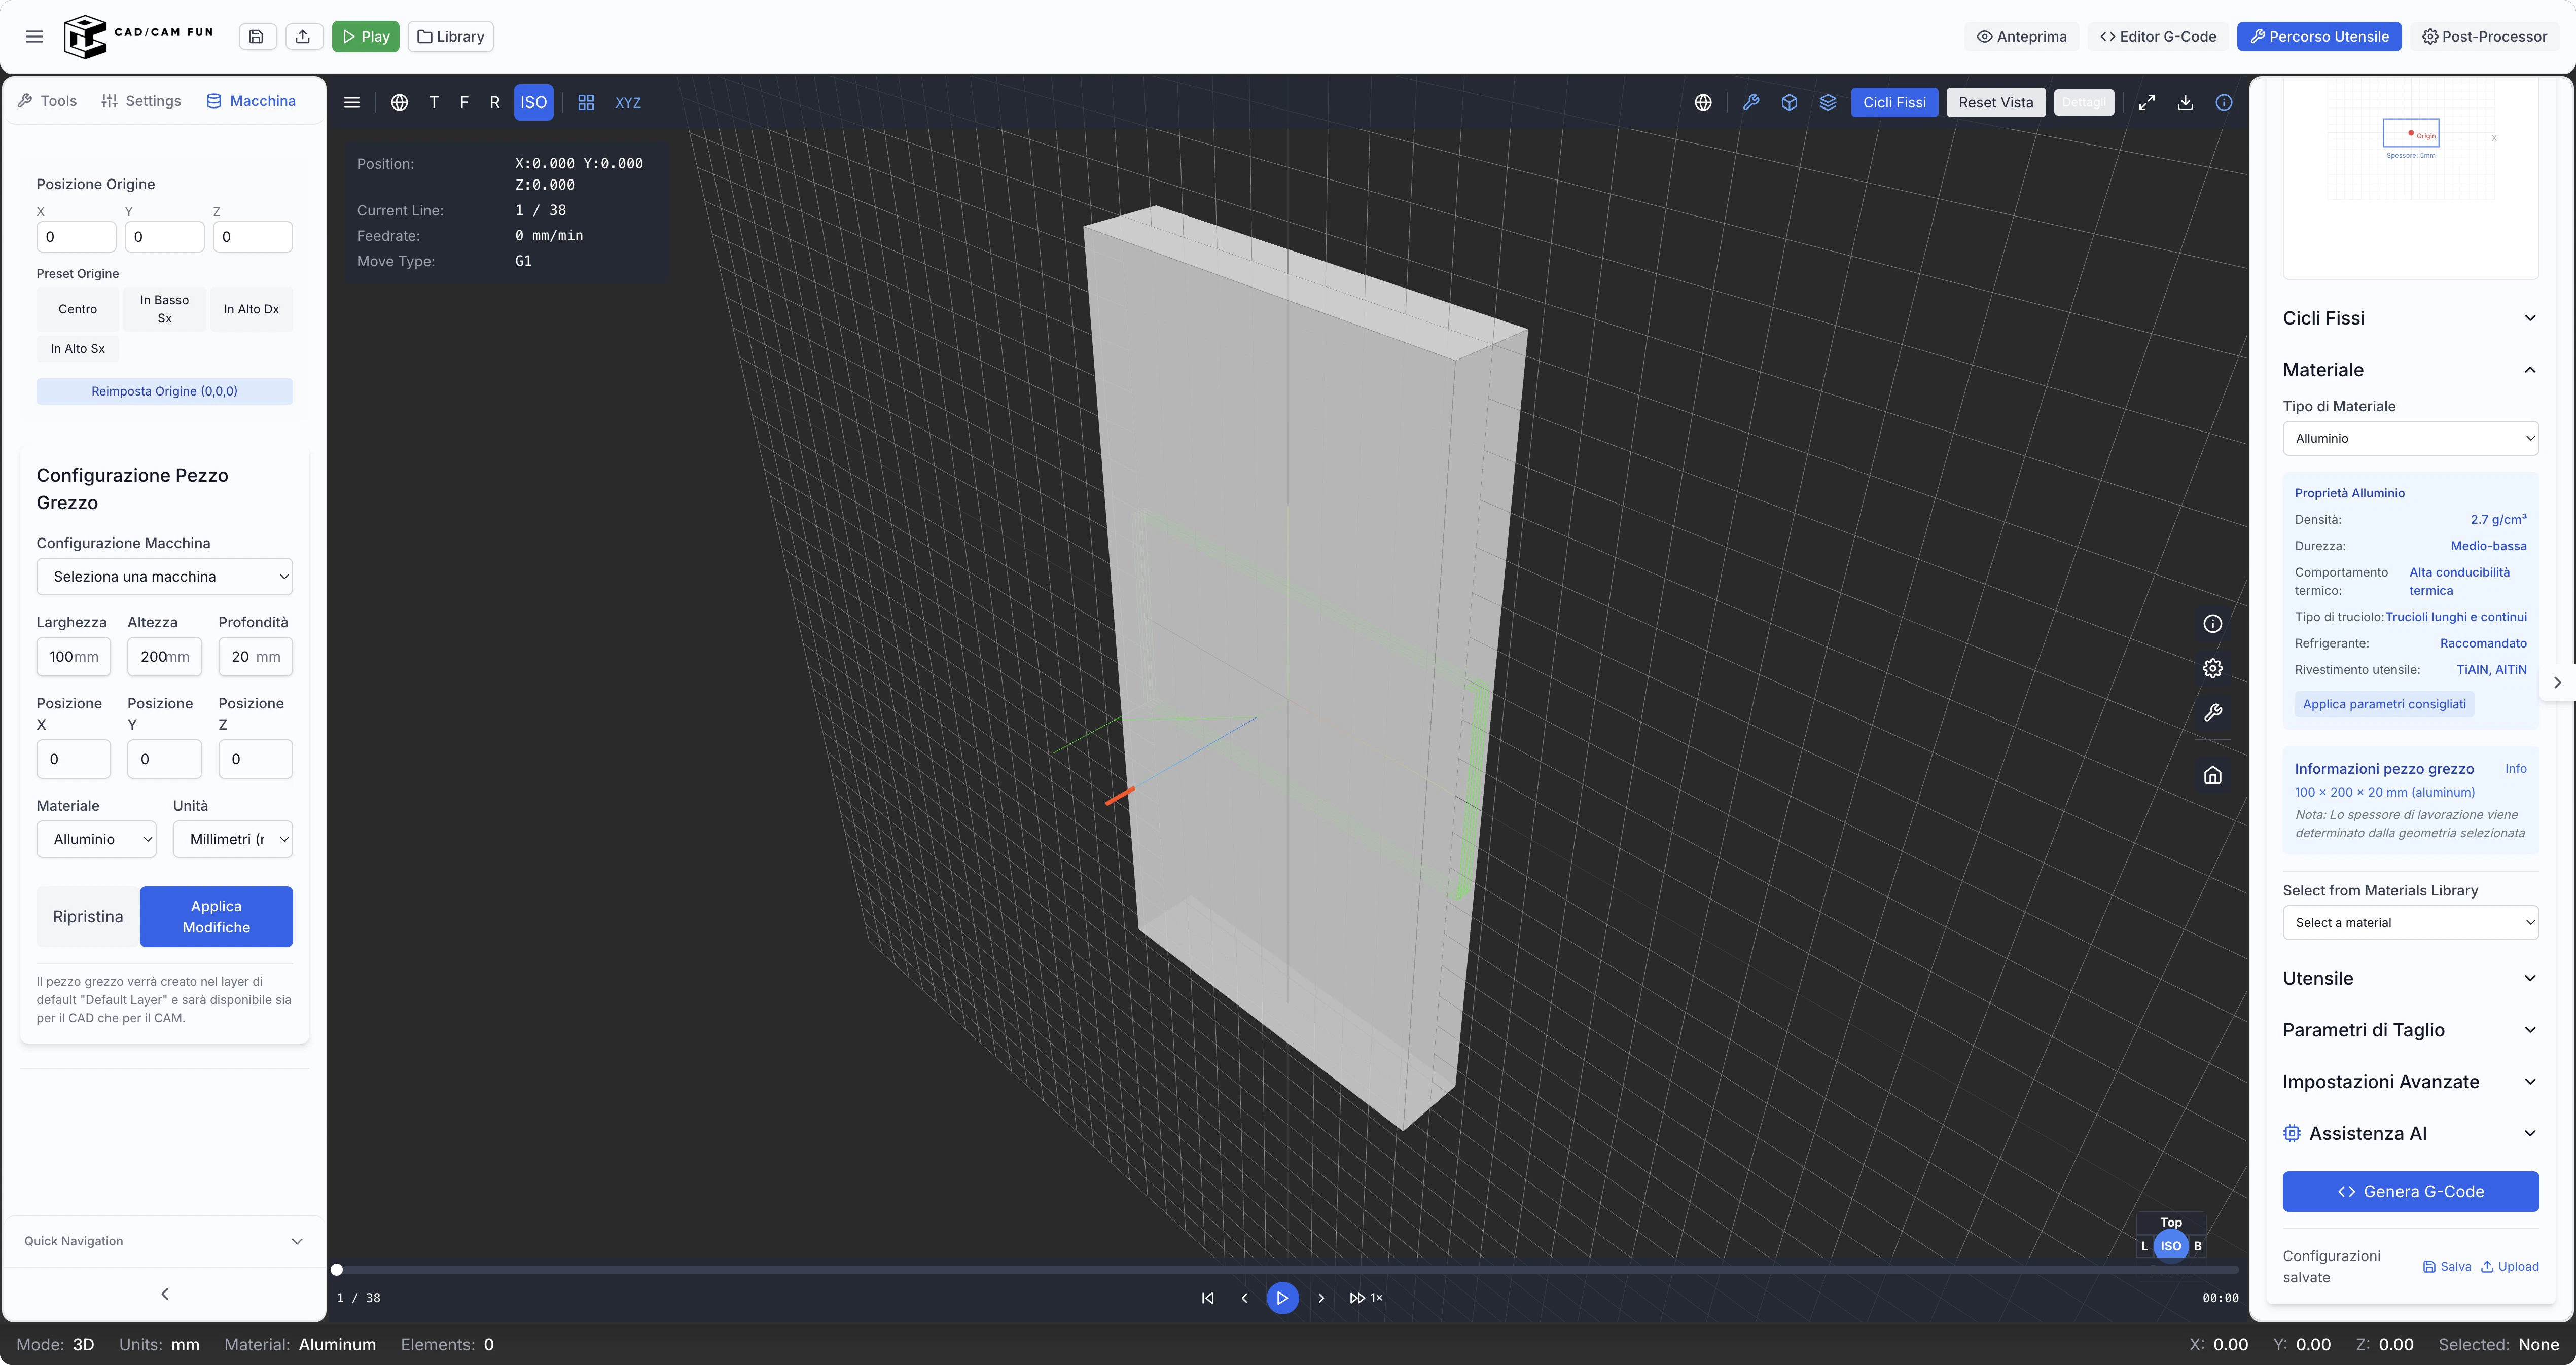
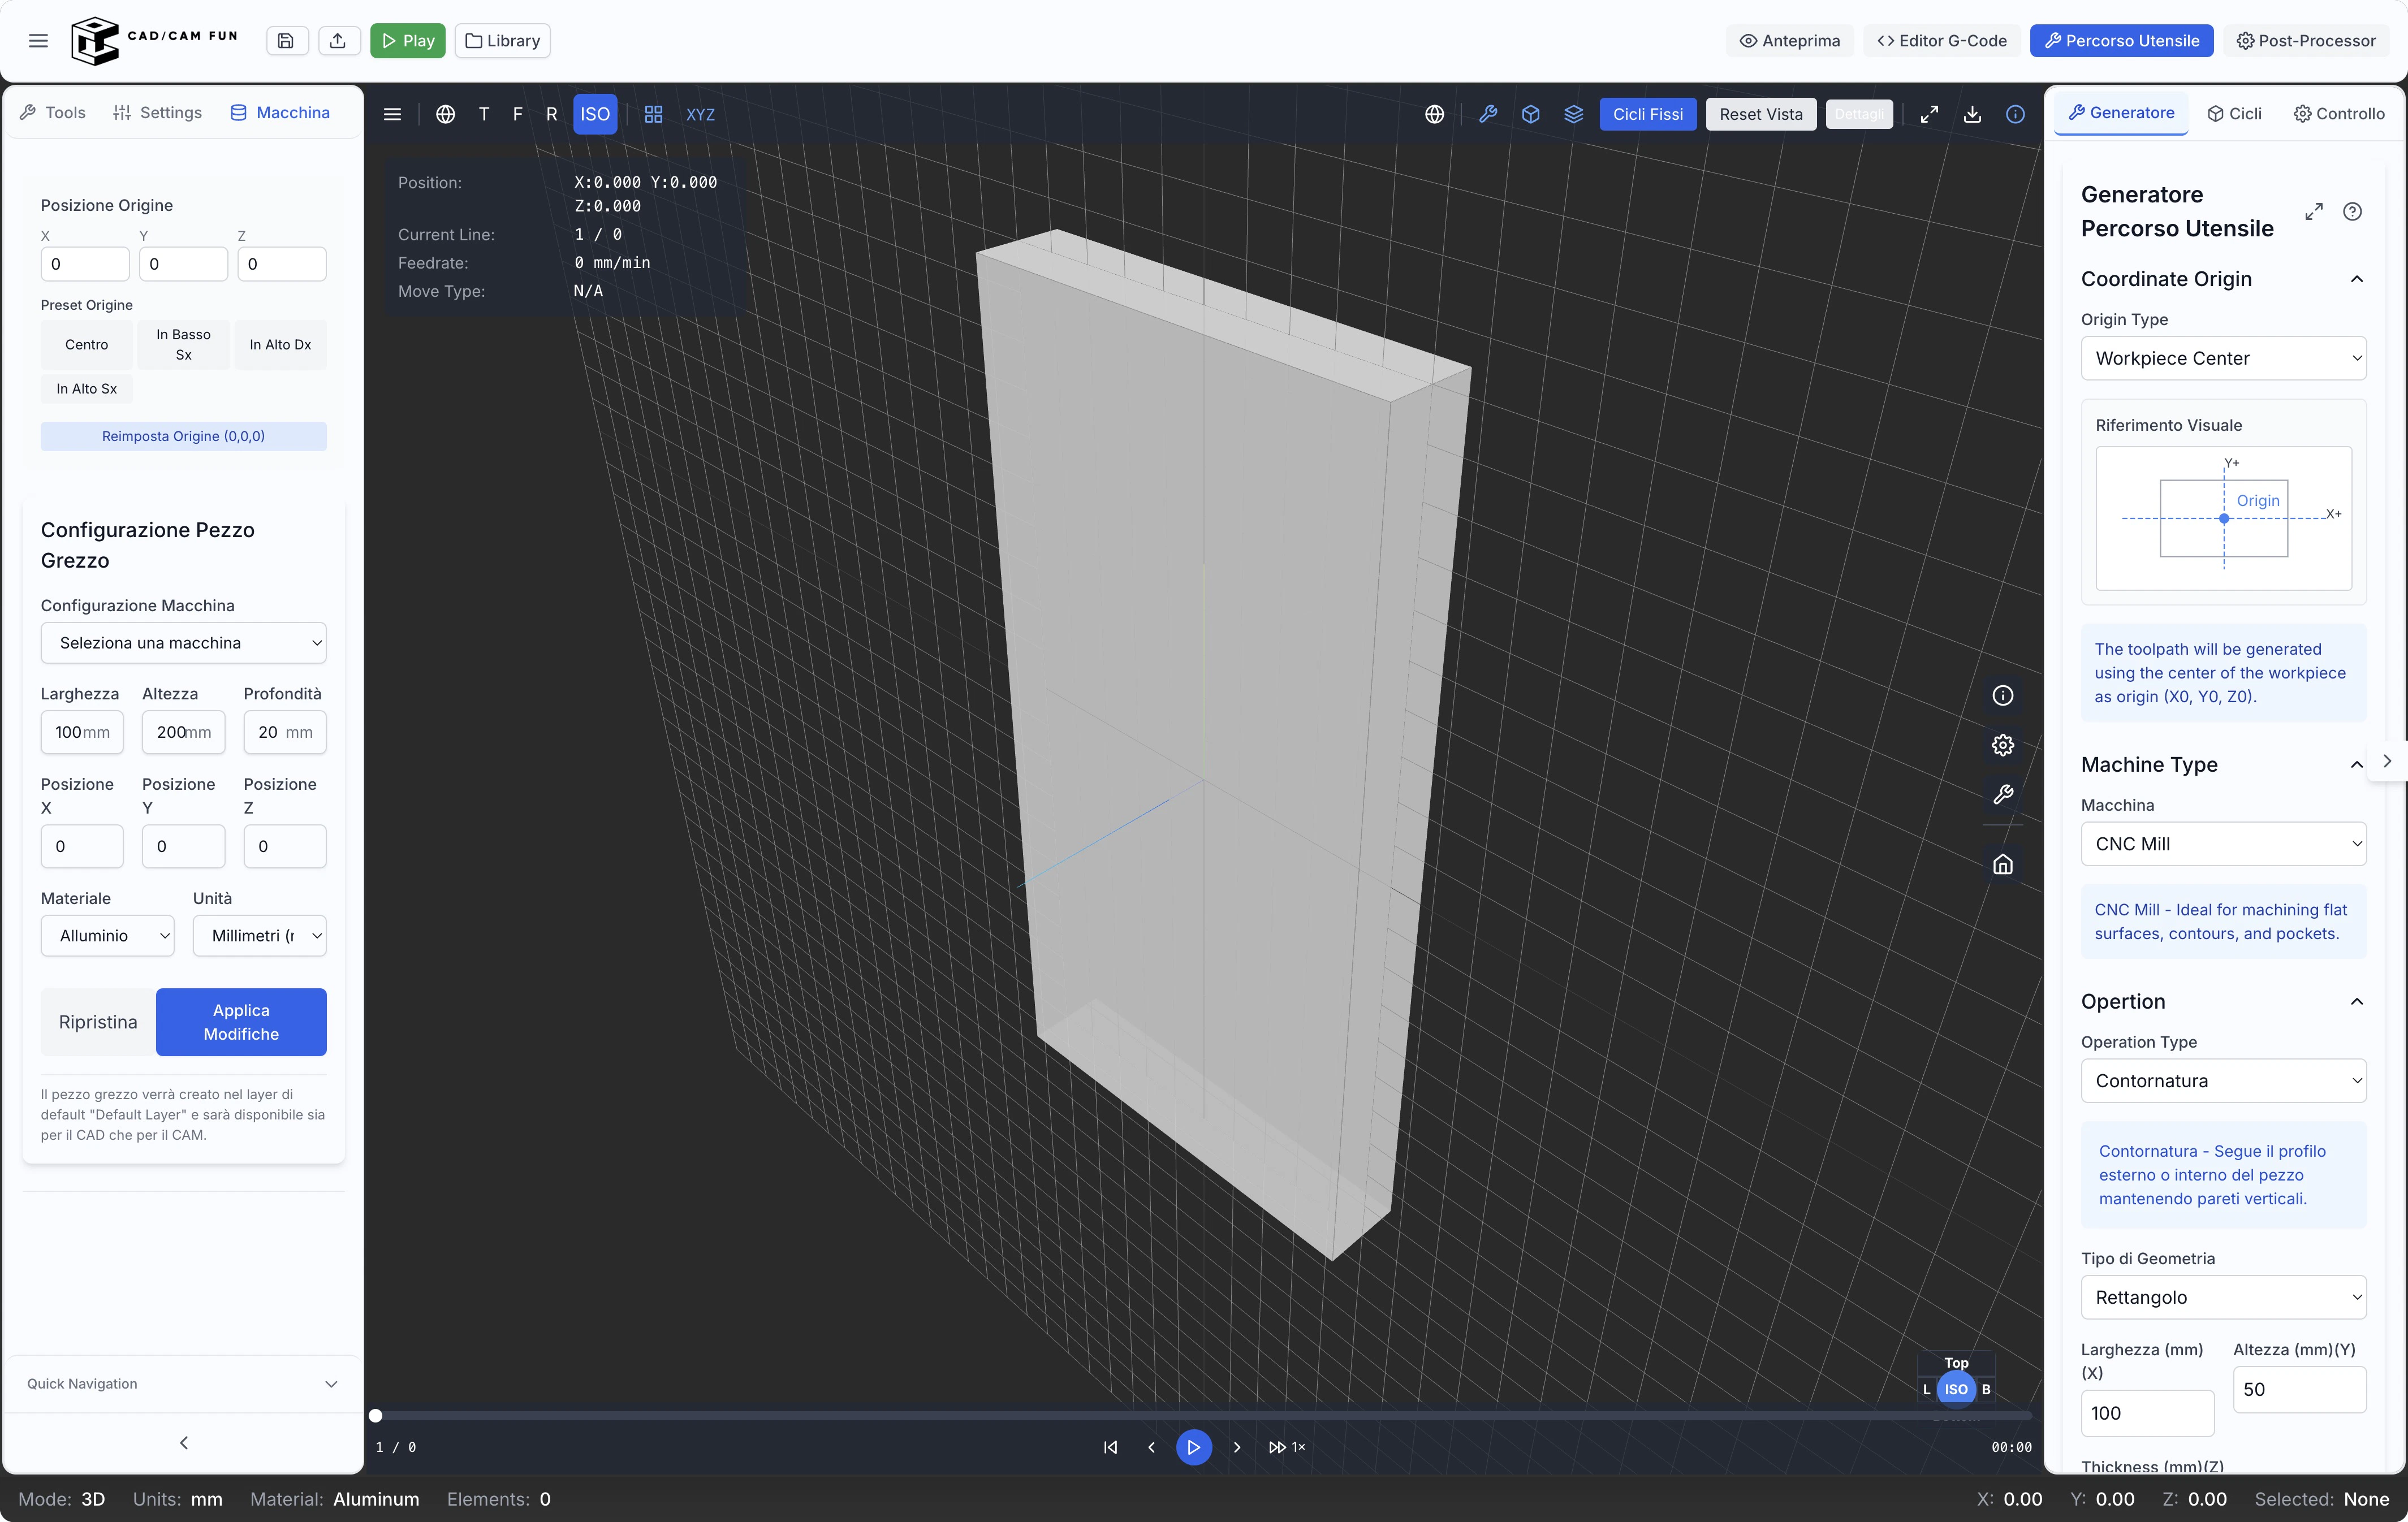
Creating a Basic Toolpath
Select operation
Select an operation type from the right panel (e.g., “Contour Milling”, “Pocket”, “Drilling”)
Machining Simulation
Generating and Saving G-code
Select post-processor
Select the appropriate post-processor type for your CNC machine (Fanuc, Heidenhain, etc.)
Using AI Features
The application includes powerful artificial intelligence tools that can help speed up your workflow:AI Design Assistant (in CAD Editor)
Access assistant
Open the CAD Editor and look for the “AI Design Assistant” section in the right panel
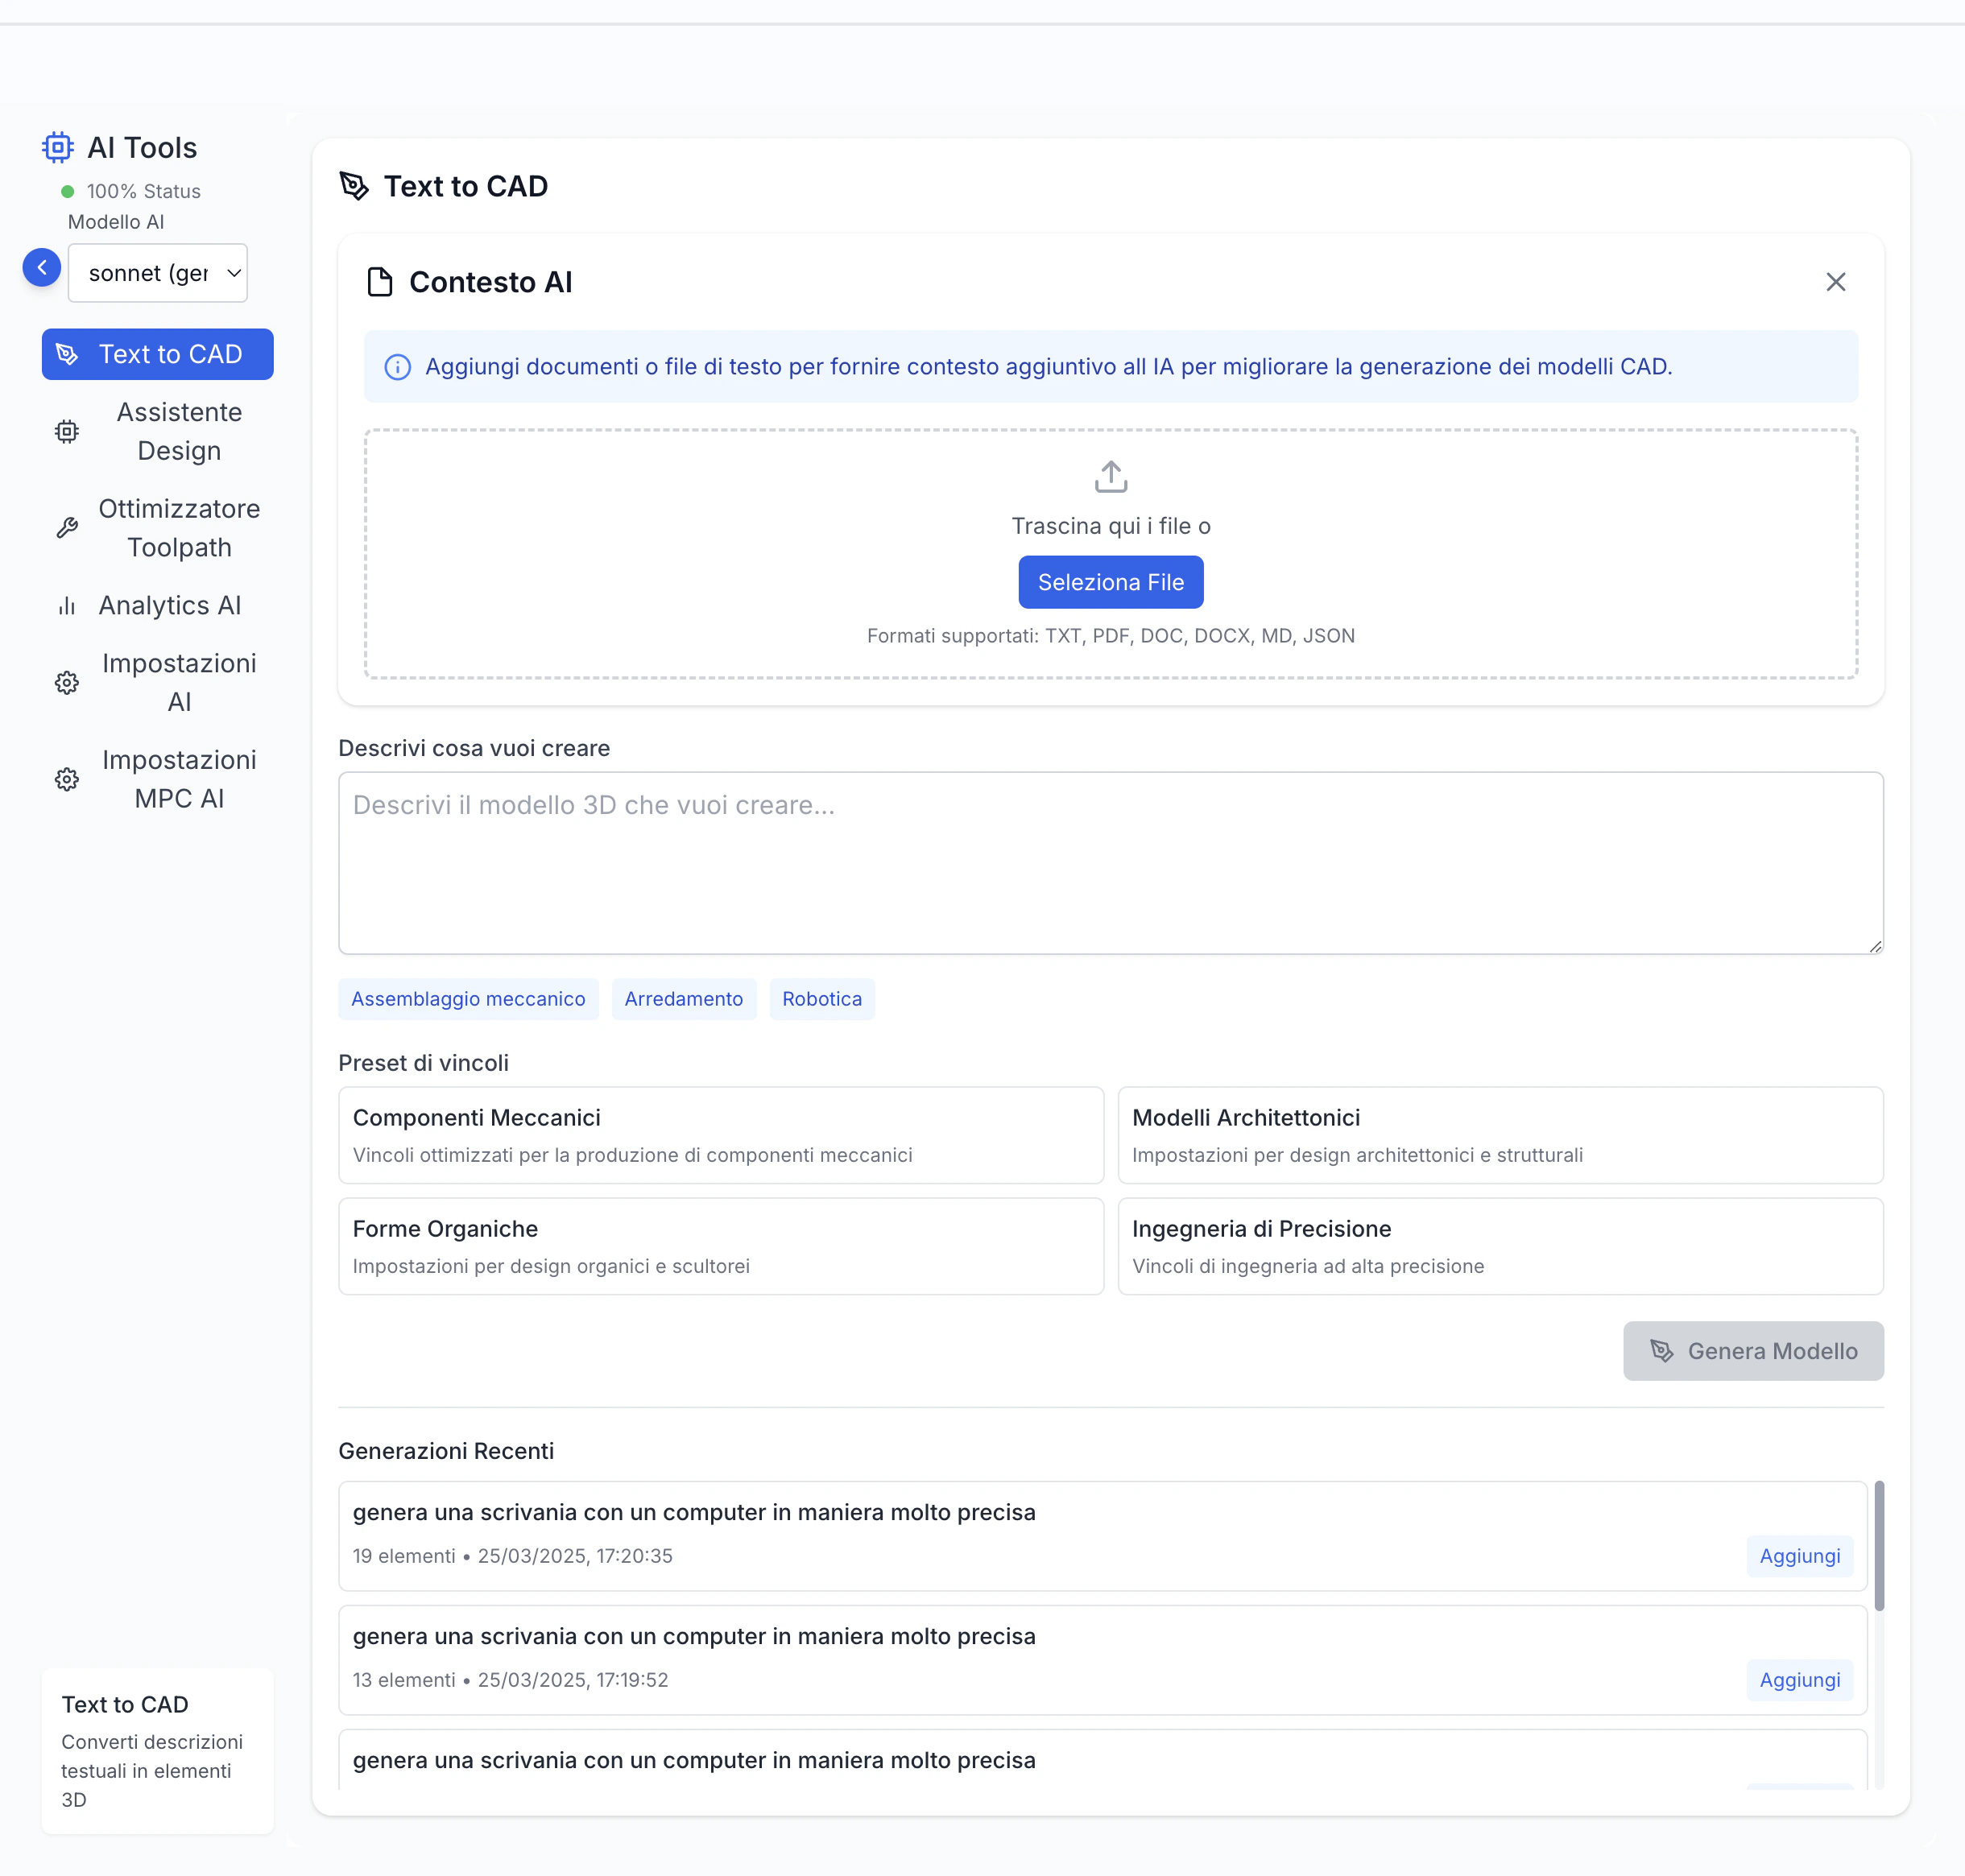
The more detailed your description, the better the generated result will be. Include dimensions, proportions, and spatial relationships when possible.
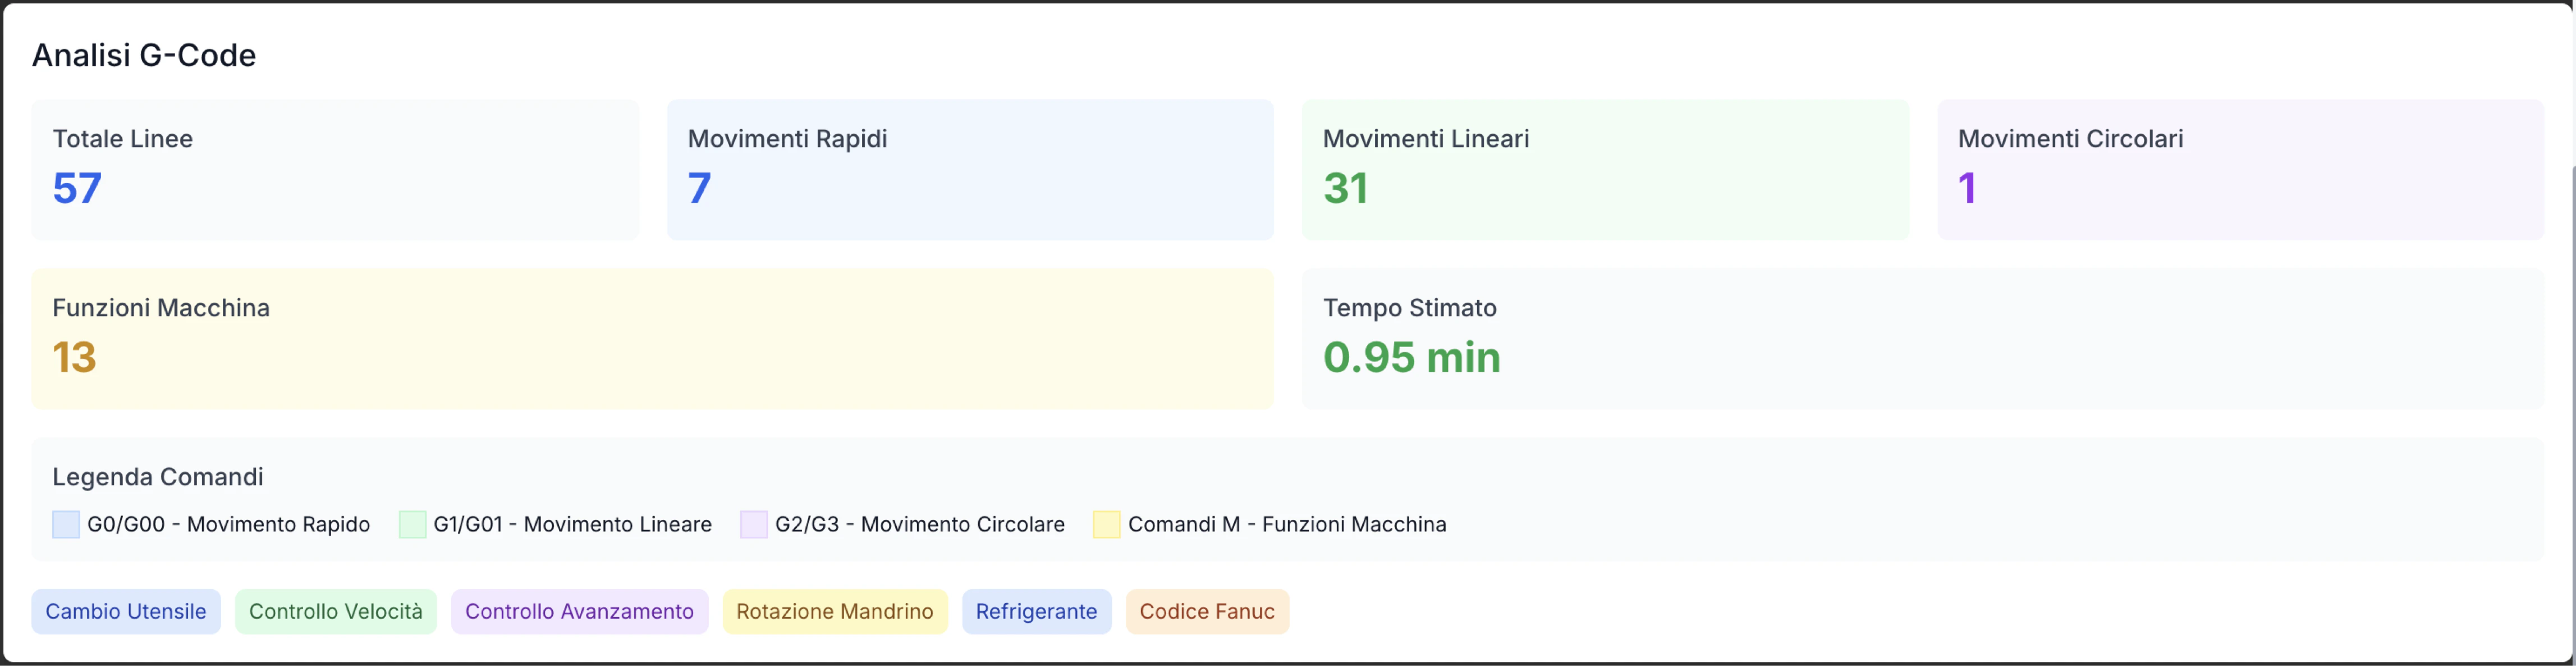
AI Toolpath Optimizer (in CAM Editor)
Project Management
To effectively manage your projects:Project Organization
Descriptive Names
Assign descriptive names to projects and files for easy identification
Detailed Descriptions
Use the description function to add important details
Folder Organization
Organize drawings in logical folders within the project
Tagging
Use tags to categorize and quickly find projects
Selective Sharing
Share projects with team members when needed
Versioning
Keep track of different versions of your projects
Tips for Beginners
If you’re new to using CAD/CAM tools, here are some tips to help you get started:Start with simple projects
Start with simple projects
Create basic shapes and simple machining operations to familiarize yourself with the interface before moving on to more complex projects. This will help you develop confidence with the tools and workflows.
Use tutorials
Use tutorials
Explore the tutorials available in the application to learn the main features. These are specifically designed to guide you through common operations.
Save frequently
Save frequently
Make it a habit to save your work regularly to avoid data loss. The application also offers an auto-save feature, but it’s always good practice to save manually after significant changes.
Explore documentation
Explore documentation
Consult this documentation for detailed information about specific features. The documentation is structured to support both sequential learning and point-of-need reference.
Try simulation
Try simulation
Always use simulation before generating G-code for your machine. This allows you to identify potential problems without risking damage to equipment.
Leverage AI
Leverage AI
AI features can help you overcome creative blocks and optimize your work. Don’t hesitate to experiment with the AI Design Assistant, even just to inspire new ideas.
In the following sections, we will explore in detail each of the application’s features. The next chapter focuses on the CAD Editor and its advanced features.